 New Client Login Form: Scheduling Page
I'm glad you're here!
I've had my current self-scheduling system for 10 years (!), and I've been upgrading some features to improve your experience.
Now you'll log into your account with your e-mail and password either at the start of scheduling or when prompted (after you select service and calendar day and time). I will not share your information with anyone. The only differences for you and with my system with adding the Client Login feature? In your profile, you now can see your upcoming confirmed appointments, canceled appointments and past appointments at any time. Yay!
⇒ Really Quick Instructions: If you're an existing client who has self-scheduled on my calendar before, once you select your service and date and time, you'll see a screen with a form for "existing clients" on the left. Click on "remind password" link in the left-side form. Enter the e-mail you've used most recently and request an e-mail with a password reset [creation] link.
If you'd like a step-by-step guide with screenshots, see below.
Step-by-Step Guidance for Creating Login Profile for First Time: Existing Clients
1. Step One for Existing Clients:
Create Your Login on Scheduling Page
Go to my Schedule Your Session page.
a. Scroll to and select service you'd like, and choose date and time.
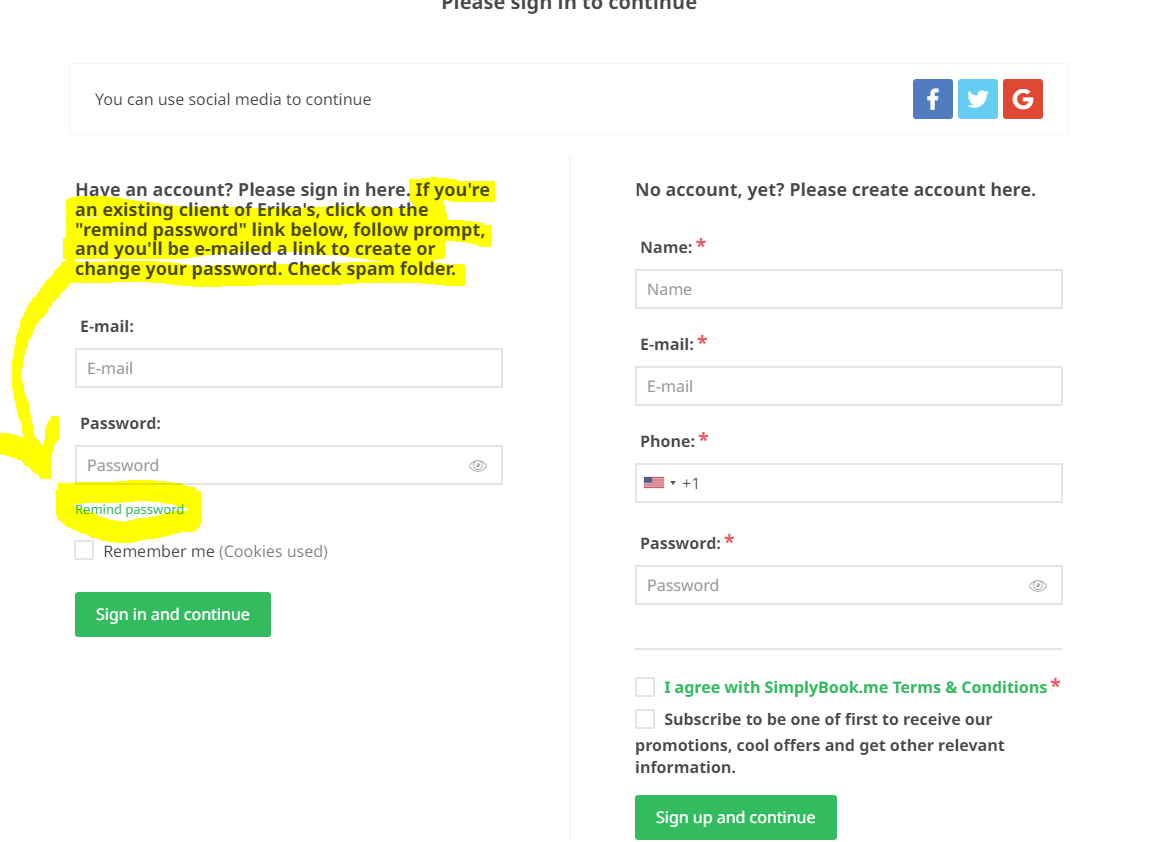
b. You'll then be prompted with a sign-in form. If you've scheduled with me before, your e-mail and history are most likely in my system.
c. Looking at the form on the left, select "Remind password" link, which is right after the open field for the password you don't yet have. You'll enter your e-mail and check your e-mail for the reset password link; check your spam folder.
*
2. Step Two for Existing Clients: Confirm Details for Session
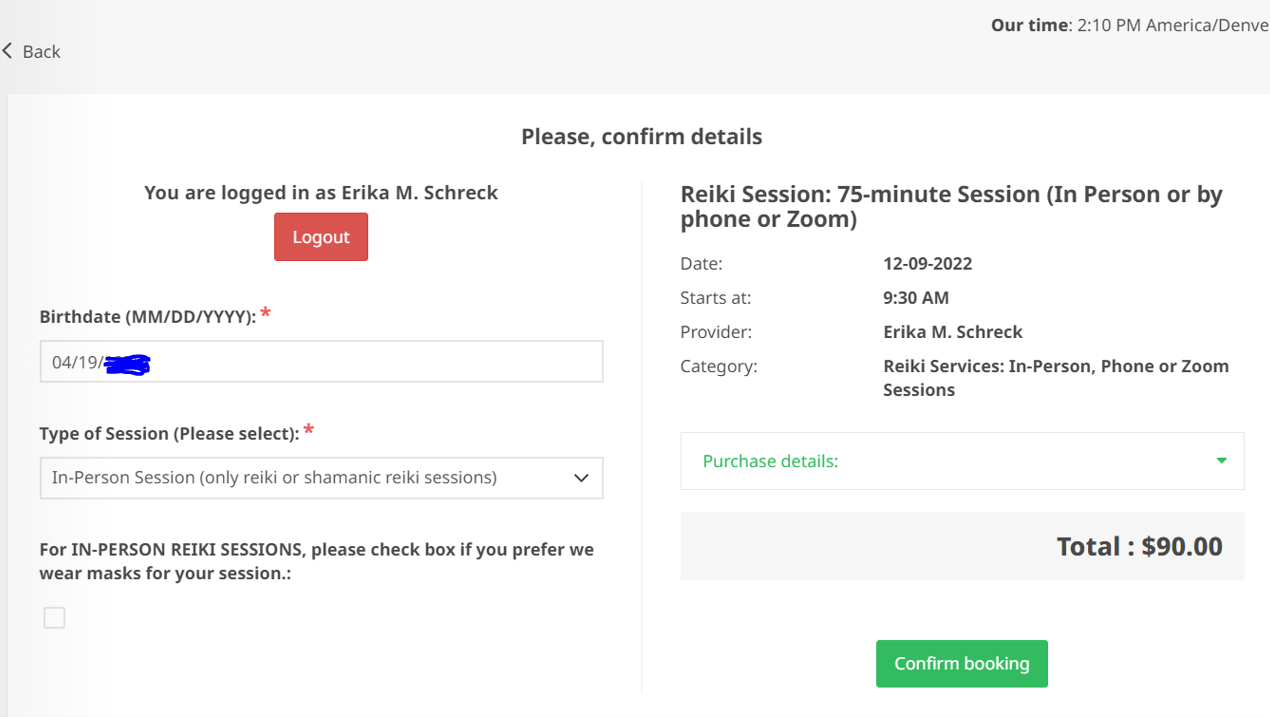
You'll see a screen that tells you that "You are logged in as ____."
a. Review and confirm your details. Check the date and time, your birthdate, your type of session, etc.
b. Click on "Confirm Booking" green button in lower right of view.
*
3. Step Three for Existing Clients: Enter Promo Code and Select Payment
Again, confirm details of your session.
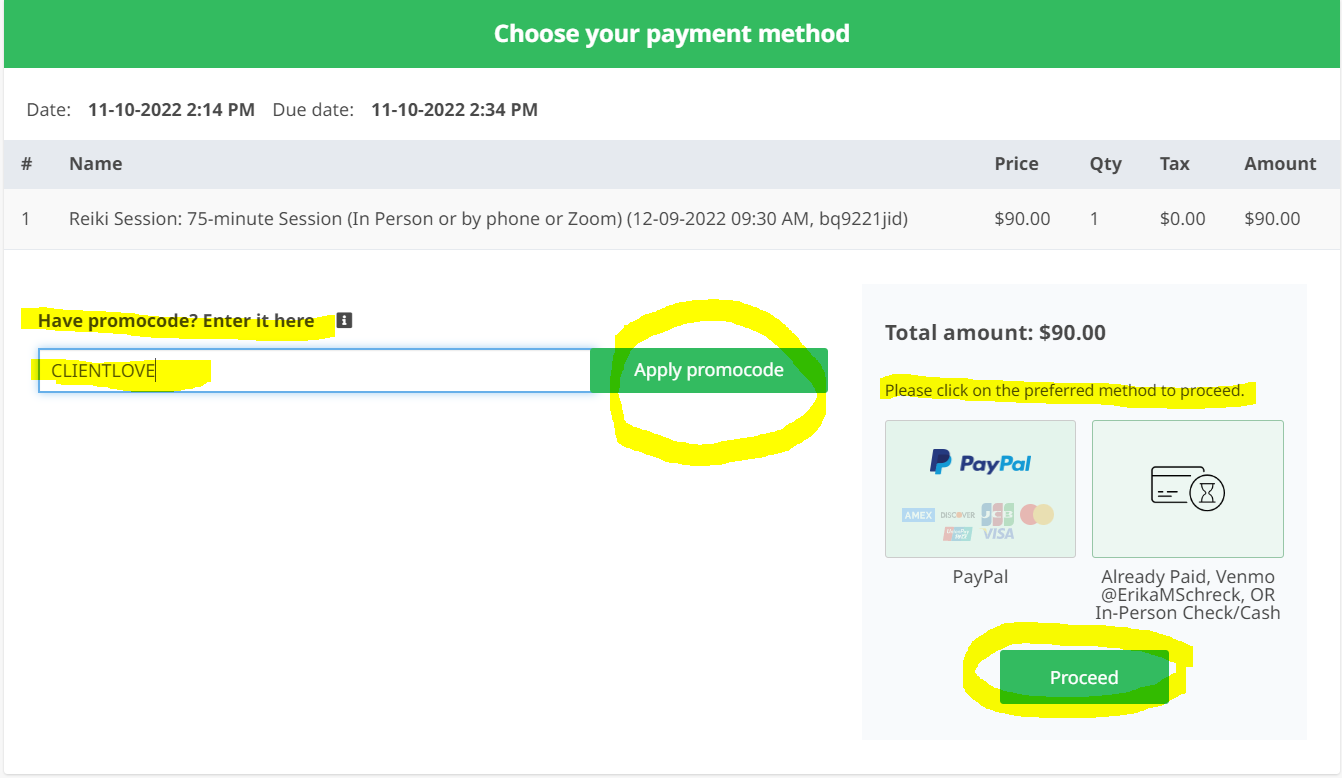
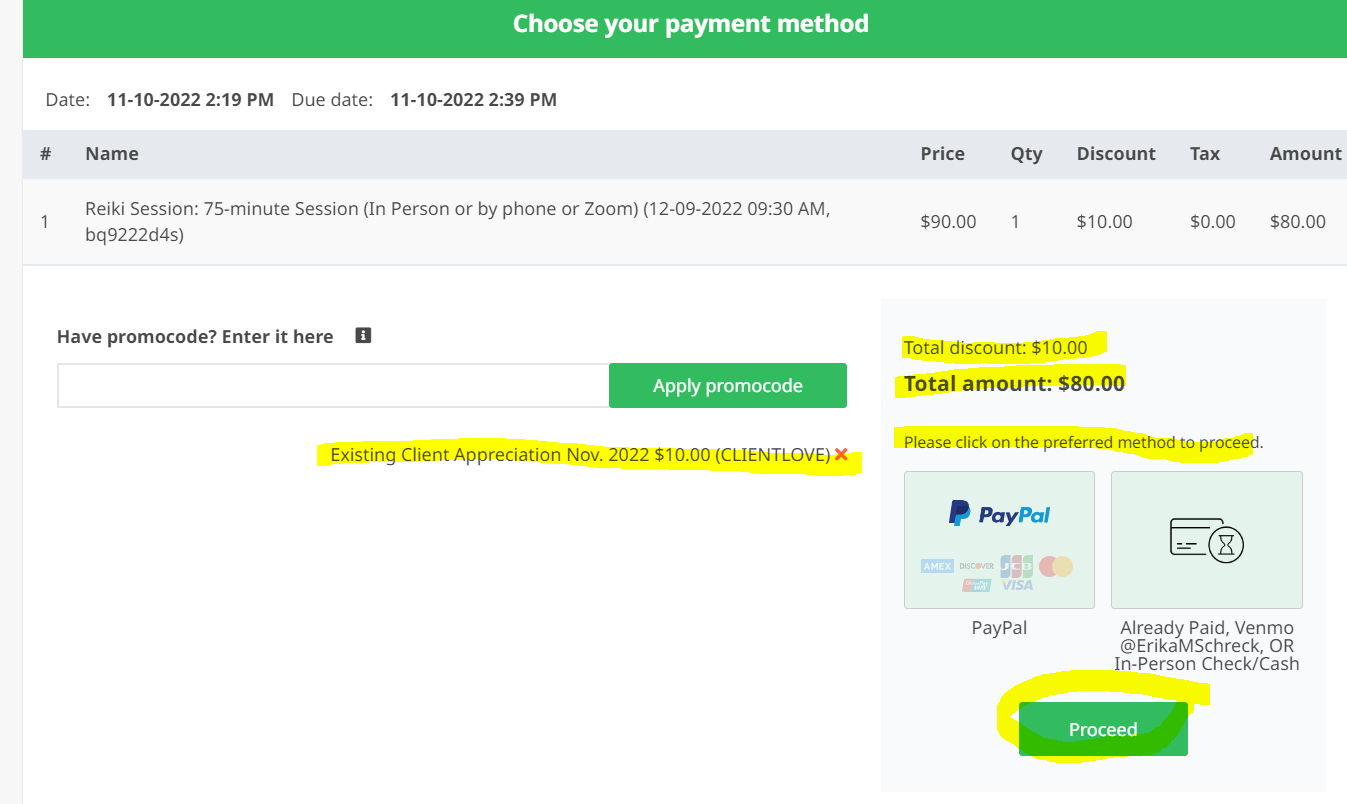
a. Only if this is the first time you're setting up your account, and you're an existing client: Enter CLIENTLOVE in the promocode field on the left side of the screen. This promocode is a thank-you for your extra time for one session; you'll save $10. If you prefer to pay another way (ex. Venmo @ErikaMSchreck), you may still use this $10 discount.
b. Click "Apply promocode" button after typing CLIENTLOVE in proper field.
c. Click on preferred payment :: If you're paying by credit card, click on PayPal box with credit card icons. If you're paying via Venmo (@ErikaMSchreck), Zelle, check or cash, click on Pay Later button.
d. Click "Proceed" button in lower right of view.
*
4. Step Four for Existing Clients:
Final Screen
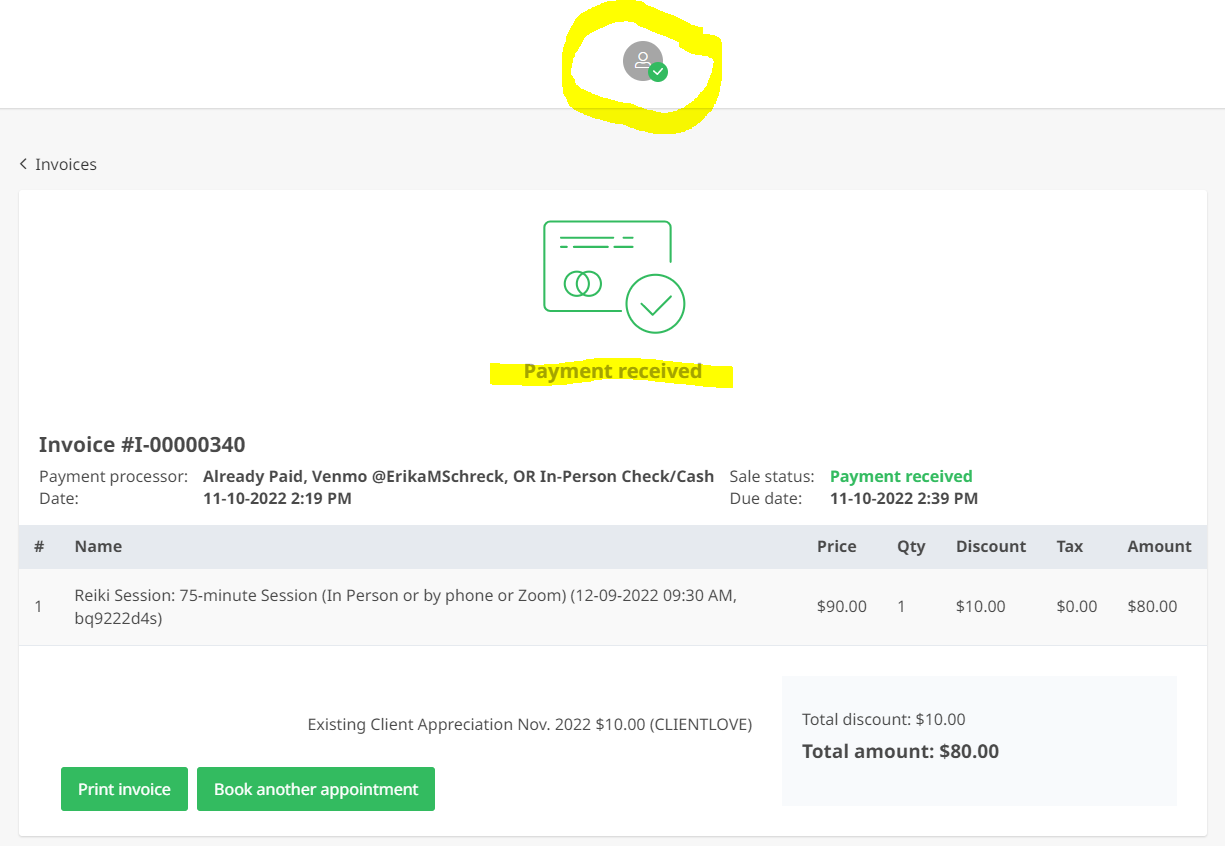
You should then see the Payment Received message.
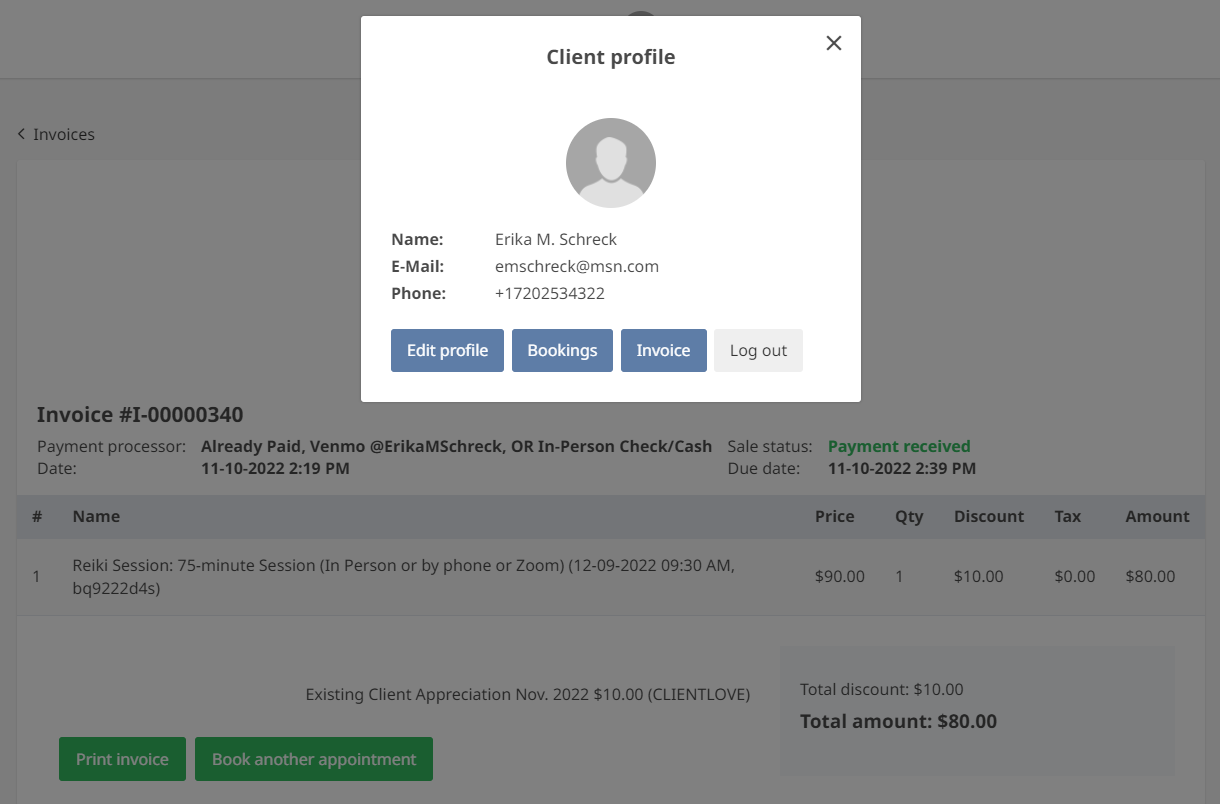
![]() You may also click on the icon (see yellow circle at right in image) at top of view, showing person icon. If you hover your mouse on this icon, you'll be able to see your bookings (booked appointments). You may also choose to log out. Or, you may click on "Book another appointment" at bottom of window.
You may also click on the icon (see yellow circle at right in image) at top of view, showing person icon. If you hover your mouse on this icon, you'll be able to see your bookings (booked appointments). You may also choose to log out. Or, you may click on "Book another appointment" at bottom of window.
*
5. (Optional) Step Five
for Existing Clients:
Review Your Bookings in Profile
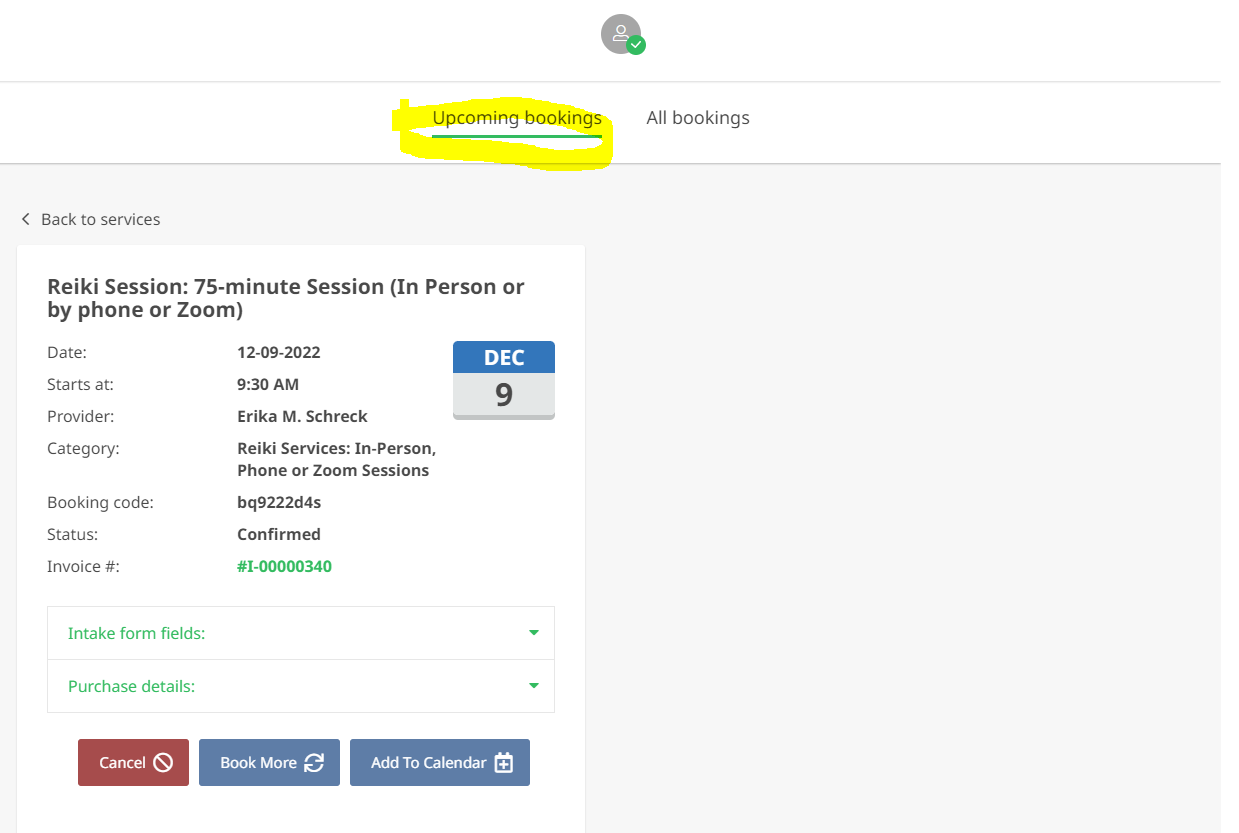
While you'll also receive a confirmation e-mail for your appointment (check your spam folder), you may see all of your bookings, past and present, by clicking on the Bookings button in your profile preview. See image above in previous step.
*
6. (Optional) Step Six for
Existing Clients: Log out
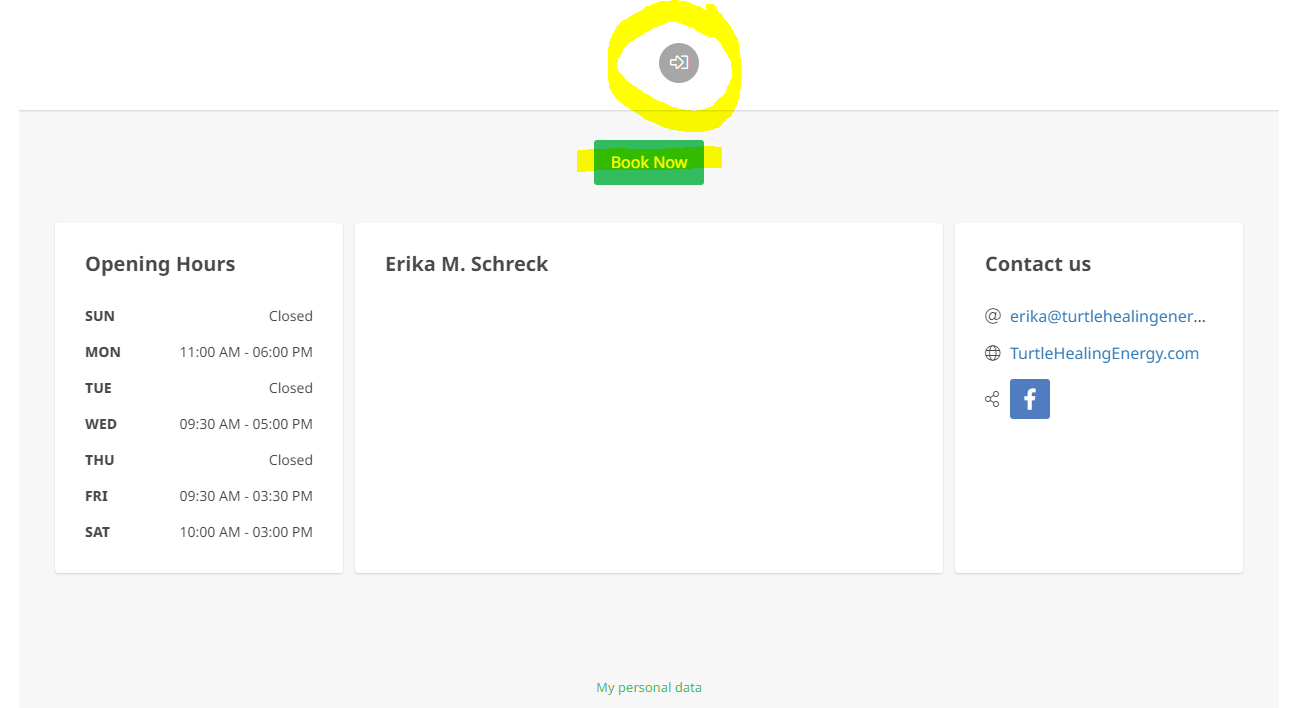
You may choose to log out of your profile, and you'll see the screen at right.
7. (Optional) You may log into
your account with the icon
on the scheduling page
On the scheduling page, and if you've logged out, you may schedule your next appointment in two ways:
a. Choose your service and date and time, and you'll be prompted to sign in: Use form at left as an existing client with your e-mail and password.
or
b. Go to the small, gray icon just above the services and log in there first. See screenshot at right.
